Landing Zone - Lesson 1
[[TOC]]
You want to build a Greeter app - application that will say hello to continents at regular intervals. You want to use Google Cloud managed services to build it, but you don't know where to start.
In this lesson, we will: 1. Create a project, our own workspace where we have managed services for our Greeter app. 2. Explore our new project with Google Cloud Console (web UI).
Project Creation
Project creation in Landing Zone is done through Merge Request flow in terragrunt-platform repository.
Everything related to Landing Zone is under deployments/lz/live folder - here is a glimpse on folder structure.
./
└── deployments
    └── lz
        └── live
            ├── 1-resman
            └── 2-project-factory
                ├── dev
                │   └── data
                │       └── hierarchy
                ├── live
                │   └── data
                │       └── hierarchy
                └── stage
                    └── data
                        └── hierarchy
Folder 2-project-factory have definitions for projects which belongs to development teams.
Let's create a project for infrastructure of our Greeter app. We will start with dev environment.
- Clone repository to your local machine and create a new branch for your changes.
- Navigate to
deployments/lz/live/2-project-factory/dev/data/hierarchyfolder. - Create new folder, called
greeter-0. -
We need to create 3 YAML files in this new directory.
_config.yaml;automation.yaml;svc.yaml. Examples below show minimal valid configuration: Note thataccesssection accepts only user emails, not group emails. -
_config.yamlshould look like this: automation.yamlshould look like this:# Project context with index (see RFC 6 - https://docs.google.com/document/d/1pGHTQeX2QfVxg1uSBVypl96NmCOTcsS3pqXXgidI9nQ/edit?tab=t.0#heading=h.sugbfwkb5933). # Most of the time its Kubernetes namespace name, where application lives. name: greeter-0 # Mandatory labels (see RFC 6 - https://docs.google.com/document/d/1pGHTQeX2QfVxg1uSBVypl96NmCOTcsS3pqXXgidI9nQ/edit?tab=t.0#heading=h.31brybhdwmgx) labels: team: devops primarycontact: l_nagy # '.' is invalid character in label, so we use '_'-
svc.yamlshould look like this# Project context with index (see RFC 6 - https://docs.google.com/document/d/1pGHTQeX2QfVxg1uSBVypl96NmCOTcsS3pqXXgidI9nQ/edit?tab=t.0#heading=h.sugbfwkb5933). # Most of the time its Kubernetes namespace name, where application lives. name: greeter-0 # Mandatory labels (see RFC 6 - https://docs.google.com/document/d/1pGHTQeX2QfVxg1uSBVypl96NmCOTcsS3pqXXgidI9nQ/edit?tab=t.0#heading=h.31brybhdwmgx) labels: team: devops primarycontact: l_nagy # '.' is invalid character in label, so we use '_' access: # access roles inside project - see RFC 6 - https://docs.google.com/document/d/1pGHTQeX2QfVxg1uSBVypl96NmCOTcsS3pqXXgidI9nQ/edit?tab=t.0#heading=h.yhowkry52zdb browsers: [] # list access viewers: [] # r/o access editors: # r/w access - permtest@ftmo.com owners: # manage permissions in project - permtest@ftmo.comTIP: You can take a look at other existing projects in project-factory and use their YAML file as reference.
-
Commit the changes, push the feature branch and create a Merge Request. If you don't have push access, make sure you report it and we will fix it.
Don't be alarmed when pipeline fails in merge request - this is by design for now, as only DevOps can execute the whole pipeline.
TIP: If you install git hooks via pre-commit utility, you will get local validation of YAML files based on our schema. The check will run as first step in CI but with
pre-commit, you can detect validation errors before you push your changes!
- After review, merge and deployment, you will have a project created for dev environment. For other environment, you repeat the steps in
stageandprodfolders inside2-project-factoryfolder.
You can check this example in action - https://gitlab.fftrader.cz/devops/terragrunt-platform/-/tree/main/deployments/lz/live/2-project-factory/dev/data/hierarchy/greeter-0?ref_type=heads
We skipped explanation of automation.yaml file on purpose. We will return back to it in Lesson 3, where we introduce infrastructure as a code.
So the project is created, what now?
Accessing new project
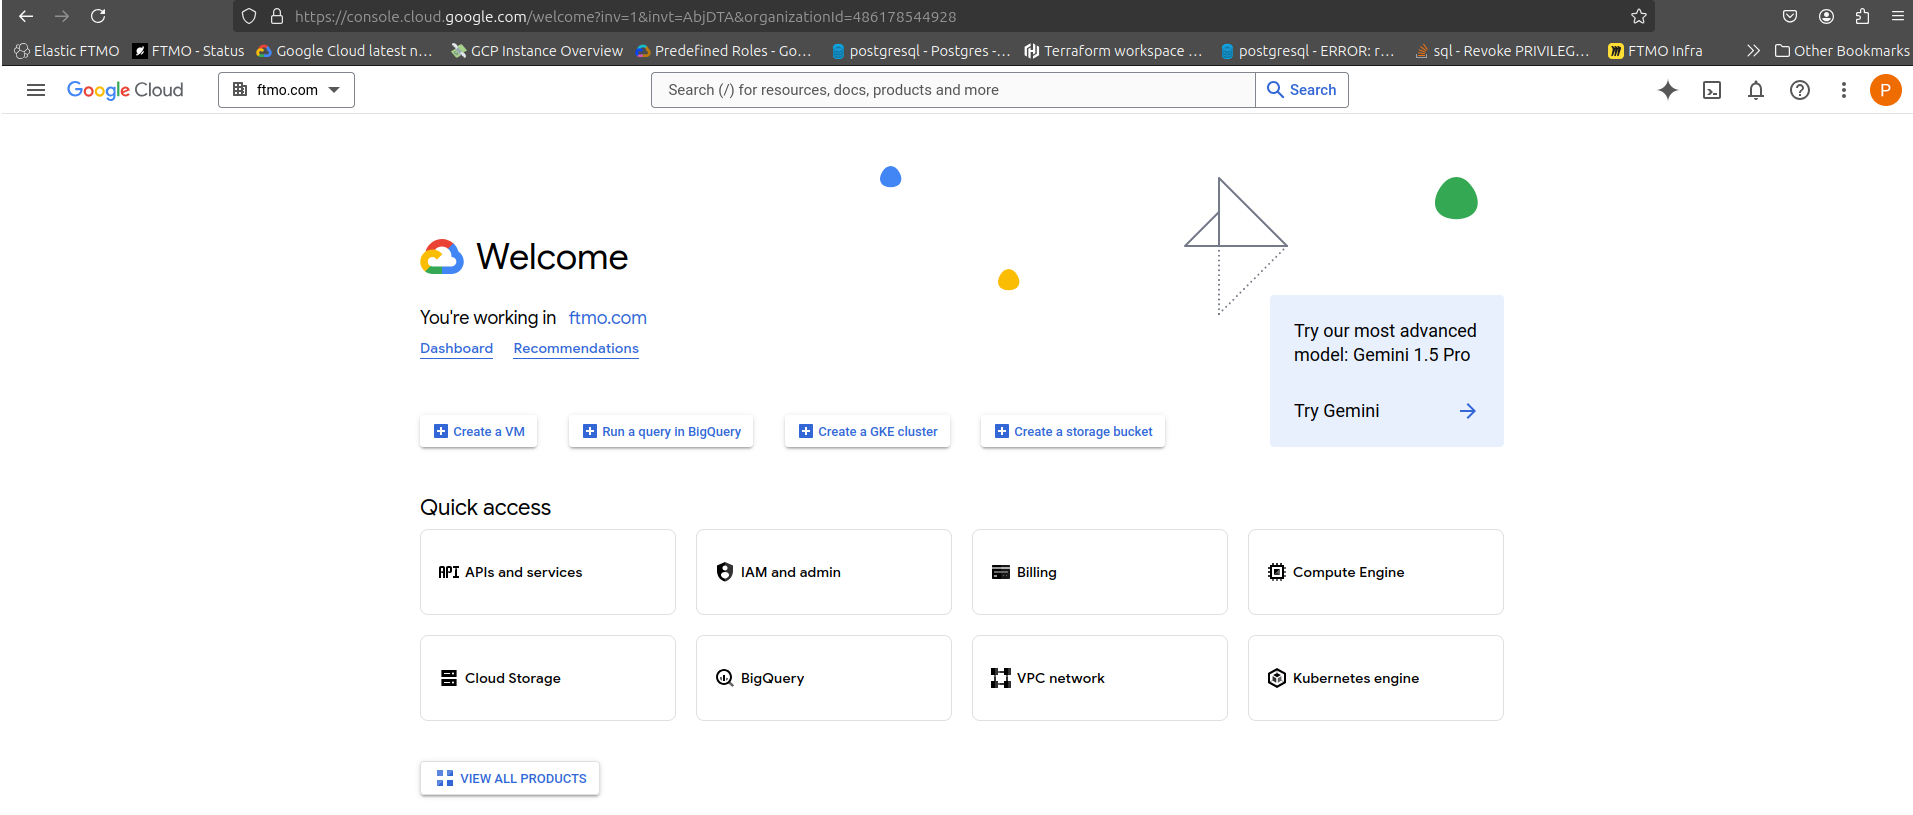
To see the project in Google Cloud Console, navigate to https://console.cloud.google.com .
You will see something like this:
To find our greeter-0 project, you have to select it, from project selector in top bar.
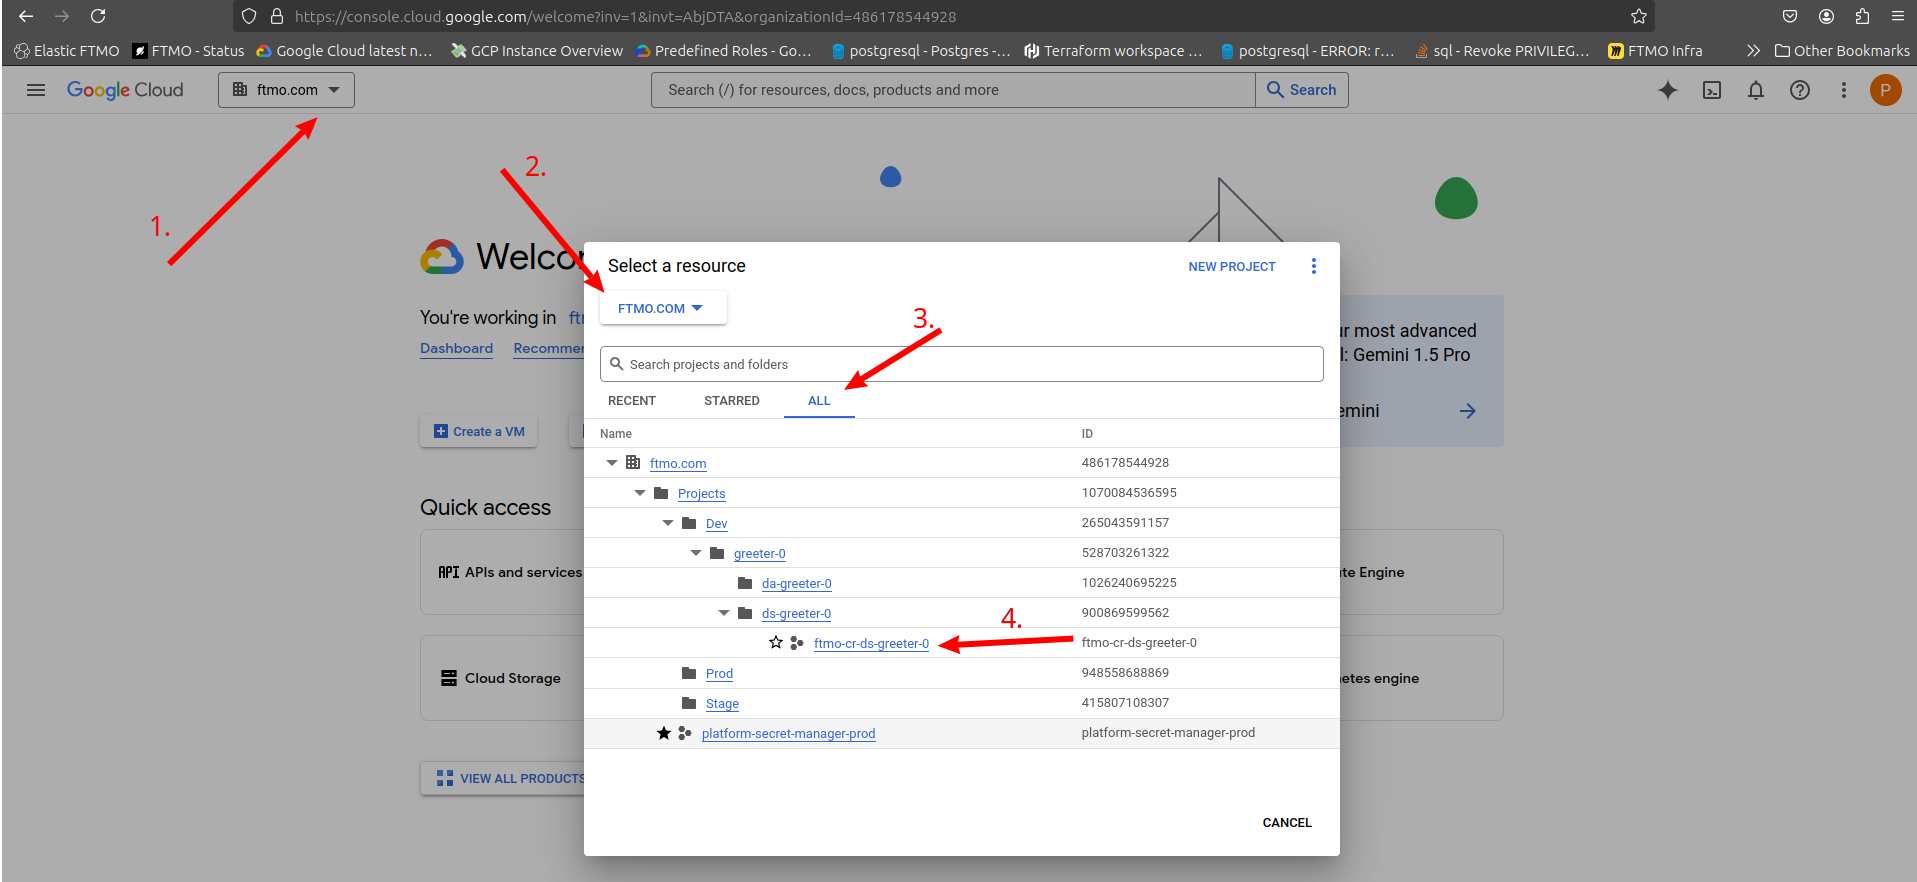
Notice that the project ID is not greeter-0 but ftmo-cr-ds-greeter-0. This is globally-unique identifier - here is excerpt from RFC 6:
- ftmo = common org. prefix
- cr = Landing Zone tenant Core
- d = dev environment
- s = service project
- greeter = project context
- 0 = index
For easier access in the future, you can "star" the project in navigation pane. You will find the project in "Starred" section later.
Interaction with project
In addition to clicking in web console to create and manage resources, you can use Cloud Shell. It is an embedded terminal + VS Code right inside the browser. This can be useful for quick ad-hoc scripts in the context of your project. To learn more about Cloud Shell, visit official documentation
As you will explore your project, you might hit the permission denied issue or other restriction, caused by organization policies. This is by design - with Landing Zone, we are trying to give you access to tools which already has sensible guardrails in place.
Check the list of supported Landing Zone services here. If you hit issue with supported service, please report it to DevOps team.
Check also list of organization policies applied on Landing Zone. Some of them can have exceptions, if justified by business needs and approved.
Summary
In this lesson, you learned how to create / request new GCP project in Landing Zone. You learned how to interact with the project using web console and w
Next lesson
In next lesson, you will learn how to create resources in your project, using web console. You will create a Cloud Scheduler job, which submits message in Pub/Sub and you will learn how to subscribe your Kubernetes application to this Pub/Sub topic.